
Switching Outputs
-20250226-122529.png?inst-v=e8ceedc8-bc75-473d-a79e-d9bf8445a4ea) | If no target is detected, the output remains in its previous state. |
Each of the switching outputs can be configured individually, as demonstrated for Output 1 in the figure below. Follow these steps to set up your desired output:
Distance to Active (Point 1): Set the distance in millimeters at which the output should change to active.
Distance to Inactive (Point 2): Set the distance in millimeters at which the output should revert to inactive (Window-Mode). For Single-Point mode, set this value to the maximum measuring range.
Mode: Choose between "Active High" (PNP-mode) and "Active Low" (NPN-mode) to set the output mode.
Active High (PNP-mode): In this mode, the output is considered active when it sends a positive voltage (high state). This means that when the sensor detects the specified condition, it will switch to a high voltage state.
Active Low (NPN-mode): In this mode, the output is considered active when it sends a negative voltage or zero voltage (low state). This means that when the sensor detects the specified condition, it will switch to a low voltage state.
Hysteresis: Define a window in millimeters to adjust the switching point based on the previous state. This helps prevent multiple switches if the target distance fluctuates around the switching point.
Delay: Specify the time in milliseconds that the signal needs to be registered before switching to active.
Release: Specify the time in milliseconds that the signal needs to be registered before switching to inactive.
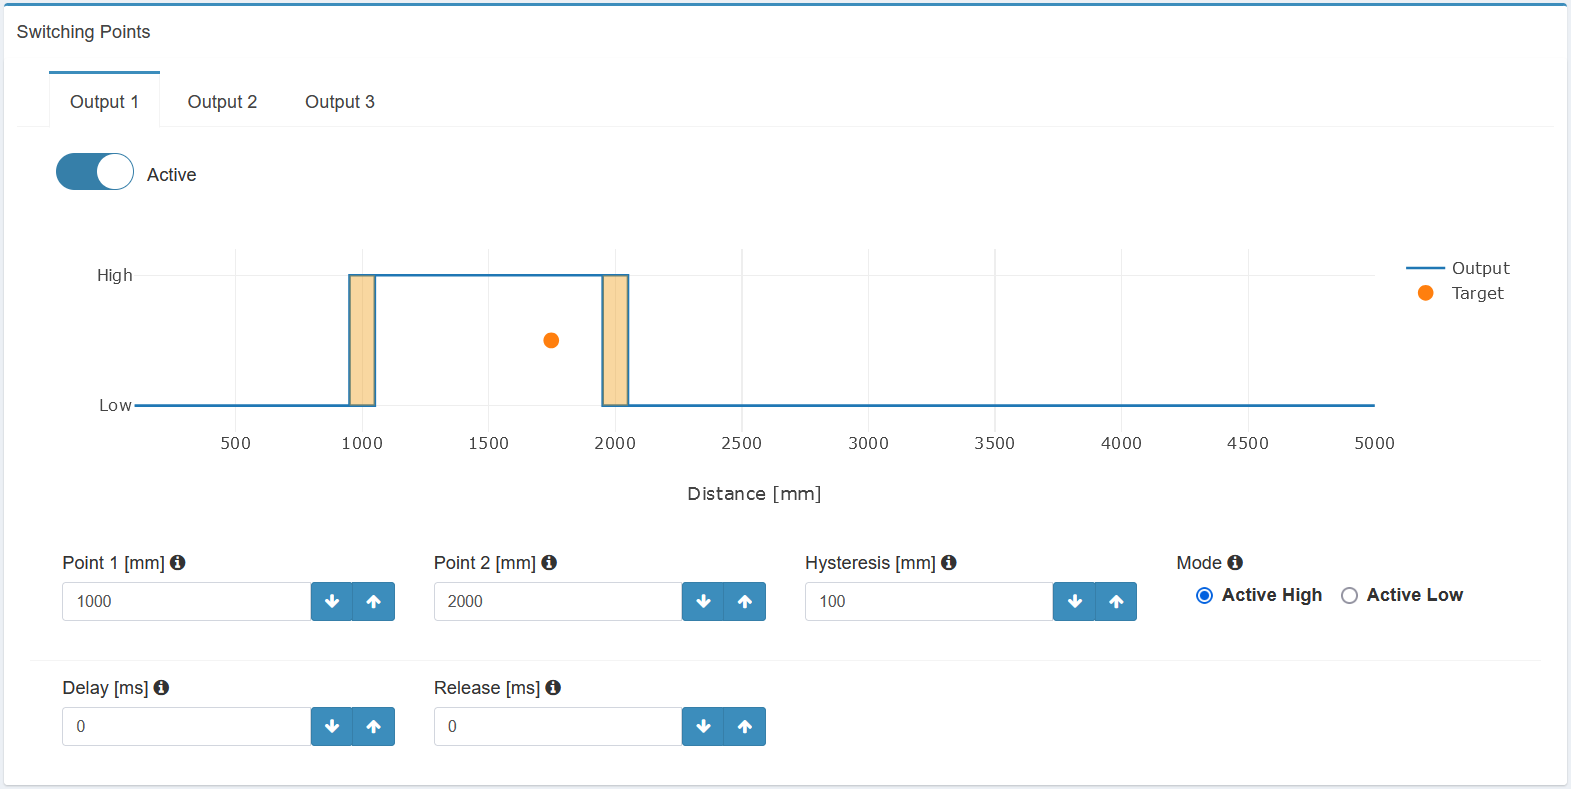
Interface for switching output configuration